How to Make a Romanian Blouse with Ioana Corduneanu
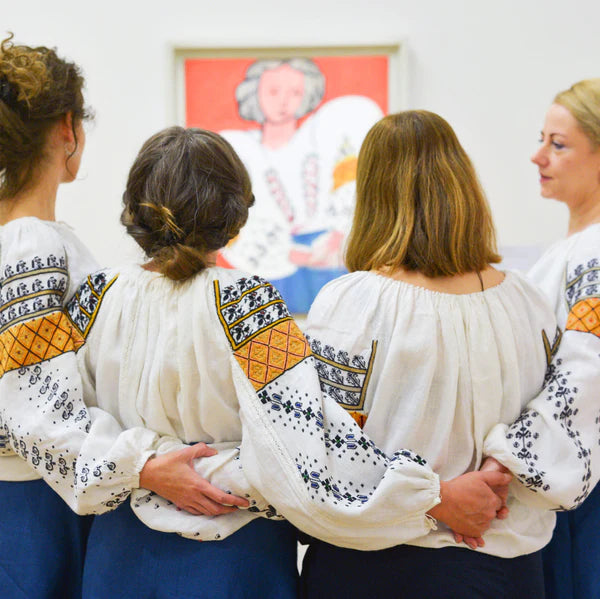
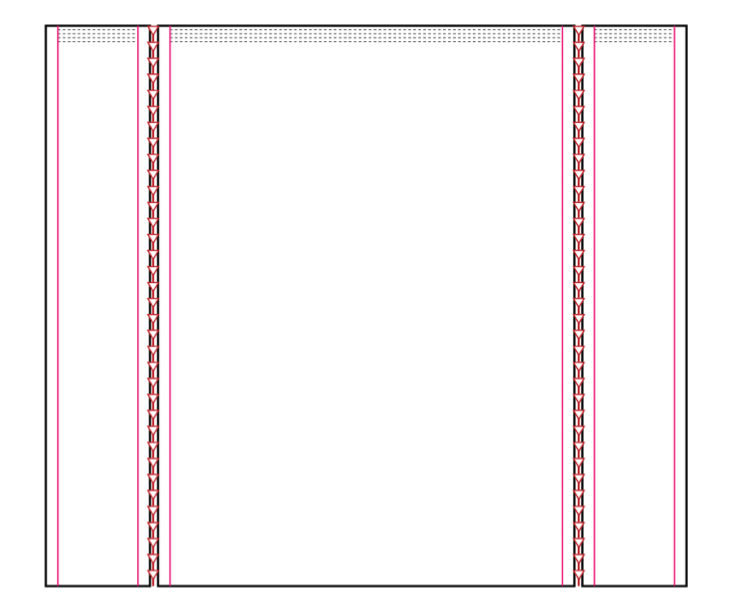
The best way to understand the Iconic Romanian Blouse is to make one yourself. Before you begin you must clear your mind of all notions of western tailoring. The shirt originates in a time before scissors and complex pattern drafting and uses the body and clever sewing techniques to achieve a comfortable fit on all body types. It was worn throughout the Carpathian mountains in what is today Austria, Czech Republic, Poland, Hungary, Slovakia, Ukraine, Serbia and Romania. This construction is based on of no-waste geometric cutting, entirely handmade. Use the width of the fabric and your body as your guide, with the spine as a centre point. If your bust is less than 100 cm then take out the additional panels for the back. If you choose to make a long tunic rather than a shirt, make the chest and back sections longer. Remember that the seams are emphasised rather than hidden and are an opportunity to show off decorative faggoting stitch.
1 Select a sturdy open weave linen, this should drape nicely, but be of a weight suitable for counted thread embroider.
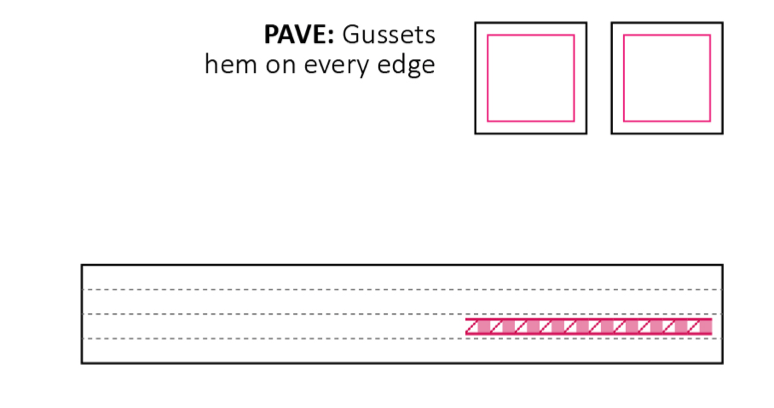
2 To begin cut a strip 20cm from the end that will become the two underarm gussets and a sample strip for testing out stitches. To do this, remove a thread from the open weave and cut between the remaining threads. Finish the gussets pieces by adding a hem around all four sides. set aside for later.
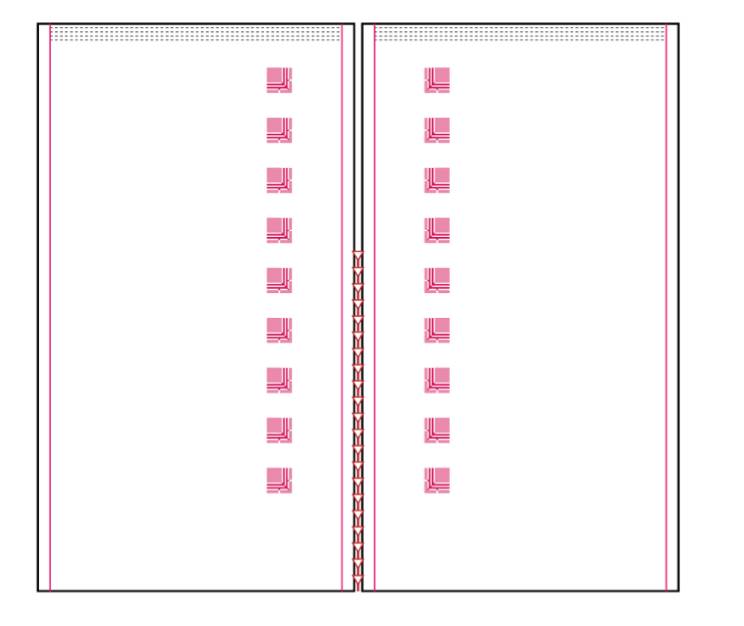
3 Cut the two shoulder pieces hem.
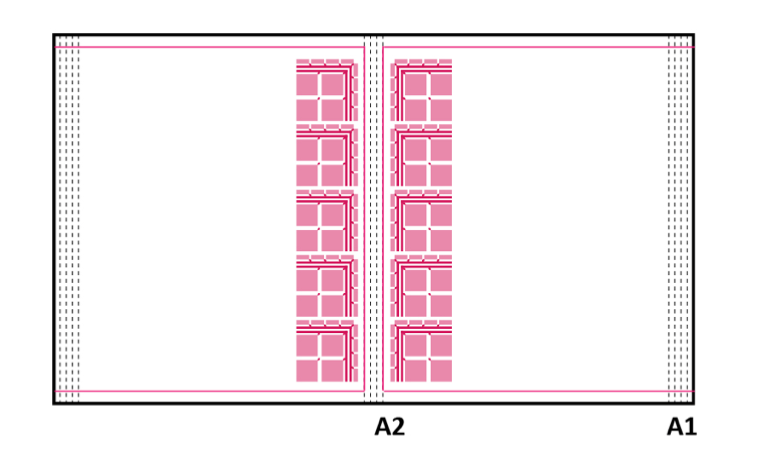
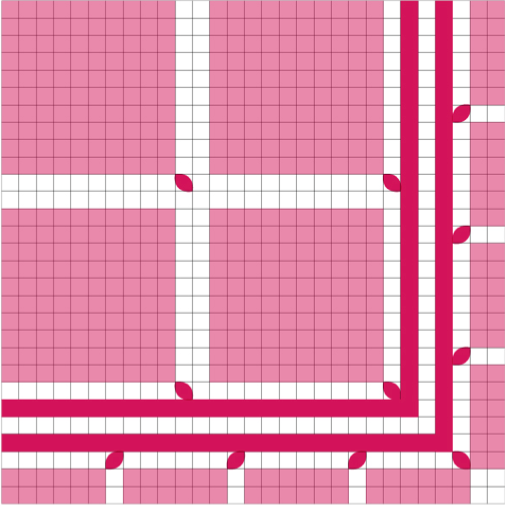
4 Work the embroidery on these pieces together as a mirror image leaving a space in between to cut later. Design your embroidery motif on graph paper and then count the threads find the middle of your shoulder and calculate how many motifs will fit comfortably into your shoulders and work from the centre out in rows. This piece will eventually be joined to your sleeve with a delicate faggoting stitch.
5 Cut out the sleeves. Allow an additional 15 cm as the fabric will shrink slightly after the first wash and the smocking technique further reduce the length of the sleeves. When gathering the sleeves at the cuff, work six rows of running stitch counting the threads as you go, these must be perfectly consistent and an even number as you will tie them together at the end. It is best to prepare the stitching for the smocking before the shirt is assembled.
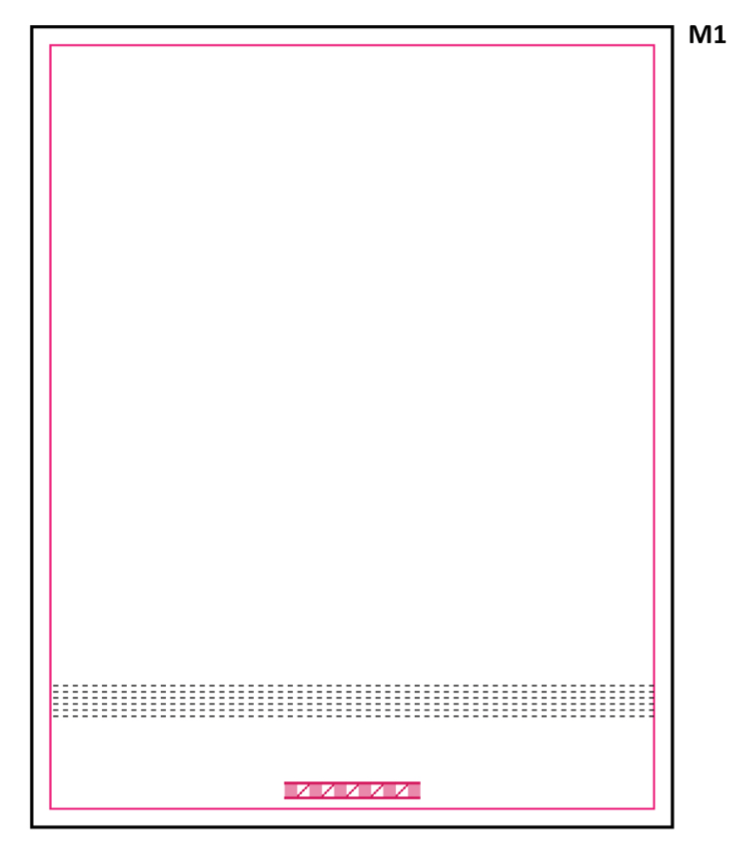
6 Cut out the Back and front sections.
7 To stitch the pieces of your shirt together, start by cutting the shoulder section in half. Stitch the shoulder pieces to the sleeves using a faggoting stitch. Make sure they are perfectly aligned and symmetrical. Stitch the back pieces starting with the upper edge and working towards the hem. Stitch the front pieces start from the bottom and work up to about 20 cm from the collar.
8 Join the shoulder pieces to the chest pieces followed by the upper edge of the sleeve A1 A2 and A3 should form Collinear points. Join the opposite side so the shoulder can be secured at the back.
9 Join two sides of the gusset to two sides of the sleeve and the other two sides one to the front and one to be back. Repeat on other sleeve.
10 Turn the sleeves inside out. Knot one end of the smocking stitching and gather. Make sure your fist fits through with an extra 2-3 cm. Work three rows of cable stitch to secure smocking.
11 Gather up the smocking around the neck so it fits inside the length of the collar we have embroidered. It is best to do the smocking piece by piece, tight in the back and looser in the front and around the shoulders. Once you are happy with this attach the collar with tiny neat dense stitches. Start at the back and finish with binding the collar to the back of the shirt. ••• Ioana Corduneanu
This project was featured in Issue 106 Cloth & Identity.
Free downloadable instructions are available
Share
